After Effects Expressions, Done Properly
Learn when to use After Effects expressions, inline code or a controller rig, how to score the options, and how to build templates others can maintain.
 Tomas Lindqvist
After Effects expressions are short pieces of JavaScript-based code attached to individual properties in Adobe After Effects. Instead of setting a value with keyframes, you write a rule: follow that layer, loop these keyframes, shake by this much, scale to fit this text. The rule is evaluated on every frame, which is what lets a single expression replace dozens or hundreds of hand-set keyframes and turn a one-off animation into a template that adapts to new content.
That power cuts both ways. Expressions save hours of manual keyframing and make templates flexible, but an undocumented expression is a trap for the next person who opens the project. A lower third that resizes itself perfectly for the designer who built it can become a mystery box for the editor who inherits it, and a rig with heavy expressions on hundreds of layers can make previews crawl. The question for most teams is not whether to use expressions but which approach to use for a given job, and how to build it so it survives handover.
This guide is a decision framework. It lays out the three realistic approaches to animating a property in After Effects (plain keyframes, inline expressions and a controller rig), the criteria that separate them, a scored comparison, and a recommendation for the situations studios and in-house teams actually face. It closes with the working habits that keep expression-driven projects readable, fast and safe to hand over.
What After Effects Expressions Actually Do Inside a Project
Every animatable property in After Effects, whether position, scale, opacity, a slider on an effect or the source text of a text layer, has a value on every frame. Normally that value comes from keyframes, or from a static number if the property is not animated. When you Alt-click (Option-click on a Mac) the stopwatch next to a property, you open an expression field. Whatever the code in that field returns on a given frame becomes the property's value on that frame. If the property also has keyframes, the expression can read them through the value keyword and modify them, rather than replacing them outright.
The language is JavaScript-based. Current versions of After Effects default to a modern JavaScript expression engine, with a Legacy ExtendScript engine kept available in Project Settings for older projects. The difference matters when you inherit old projects or copy expressions from old forum posts: some syntax that the legacy engine tolerated, such as if/else statements without braces written on one line, or certain uses of this, behaves differently or throws errors in the JavaScript engine. Adobe documents the engines, the object model and the full list of built-in methods in the Adobe Help Center expression language reference, which is the first place to check when an expression copied from elsewhere refuses to run.
The four jobs expressions do well
Almost every useful expression falls into one of four families, and knowing which family you are in tells you how complicated the code needs to be.
- Procedural motion. wiggle(freq, amp) produces organic jitter; time * 90 on rotation spins a layer at 90 degrees per second; Math.sin(time * 2) * 20 creates a bob. None of these need keyframes at all.
- Looping. loopOut("cycle"), loopOut("pingpong") and loopOut("offset") repeat the keyframes you set, so a four-keyframe pulse becomes a pulse that runs for the length of the comp.
- Linking. The pick whip, the spiral icon beside an expression field, lets you drag to another property and writes the reference for you, for example thisComp.layer("Controls").effect("Accent Size")("Slider"). One property now follows another.
- Responsive layout. sourceRectAtTime() returns the width, height, top and left of a text or shape layer, which lets a background box grow to fit whatever text is typed in. This is the backbone of most lower-third and title templates.
Most real-world rigs combine these: a linked slider drives an eased value that feeds a responsive layout. But the families are a useful check. If an expression you are about to write does not clearly belong to one of them, it is often a sign that keyframes or a script would serve better.
The Three Options: Keyframes, Inline Expressions and Controller Rigs
When you face a new animation task, the choice is rarely "expressions or not." It is a choice among three approaches, each with a distinct cost profile.
Option 1: Plain keyframes
Every value is set by hand on the timeline, eased in the Graph Editor, and nothing is computed. This is the default and, for a large share of work, still the right answer. A hero logo reveal that exists once, is timed to music and will be art-directed frame by frame gains nothing from code.
Option 2: Inline expressions
Individual properties carry their own self-contained expressions: a wiggle on a camera, a loopOut on a spinning icon, a box that sizes itself to a text layer next to it. Each expression lives where it acts and depends on little outside its own layer. This is how most artists first meet expressions, and for small, contained jobs it is efficient.
Option 3: Controller rig
All the values a user might want to change, such as colors, sizes, timing offsets, text content and toggles, are exposed on a single null or controller layer through Expression Controls effects (Slider, Checkbox, Color, Point, Angle, Layer and Dropdown Menu). Every other layer reads its values from that one place. The controller layer is often then published through the Essential Graphics panel so that editors in Premiere Pro can change those values without opening After Effects. This is the architecture behind robust templates and the one that takes the most planning.
Scripts are a fourth tool, but they operate at a different level: a script runs once to build or modify a project, whereas an expression runs on every frame. If your problem is "create 60 comps from a spreadsheet" or "rename every layer in this project," that is scripting territory, covered in our guide to automating After Effects with scripts. Many production pipelines use both: a script generates the comps, and a controller rig inside each comp keeps them adjustable.
Six Criteria That Decide Between Them
The right approach depends on the job, and the job can be described with six questions. Answer them before writing a line of code and the choice usually makes itself.
1. How many times will this animation be reused?
Reuse is the single strongest signal. An animation that will be versioned once or twice rarely repays the setup time of a rig. One that will be produced 20, 50 or 200 times, such as a lower third for a weekly series or a social template for a product catalog, almost always does. The break-even point depends on the complexity of the animation, but a useful heuristic is that if you expect to change the same values by hand more than five or six times, the values should be driven rather than keyframed.
2. Who will change it after you?
If the answer is "only me, this week," readability matters less. If the answer is "an editor in Premiere who has never opened After Effects" or "another studio in six months," readability and control design become the dominant criteria. The person inheriting the project should be able to find every adjustable value in one place and understand what it does from its name alone.
3. How variable is the content?
Fixed content can be keyframed to fit. Variable content, especially text of unknown length, multiple languages, or names that range from four characters to forty, needs layout that responds. That means sourceRectAtTime() and some arithmetic, which in turn means expressions.
4. How much art direction does the motion need?
Procedural motion is consistent; it is also generic. A wiggle never has intent. When a client wants a specific overshoot on the third beat, or an animator wants to hand-shape a curve in the Graph Editor, keyframes are more expressive. Expressions can modify keyframed motion, but the more of the character of the motion that lives in code, the harder it is to art-direct.
5. What will it do to preview and render performance?
Expressions are evaluated every frame, and complex expressions can slow previews noticeably. A single wiggle is negligible; a sourceRectAtTime() call repeated across 300 layers, or an expression that loops through every layer in a comp on every frame, is not. Performance is covered in more depth in our guide to speeding up After Effects previews, but it belongs in the decision from the start, not as a fix afterward.
6. How fragile can the project afford to be?
Every expression is a dependency. It refers to a layer, an effect or a comp by name or index, and that reference can break. A project with no expressions cannot break this way; a project with 400 cross-comp references has 400 places where a careless rename, a replaced precomp or a changed layer order can produce an error bar and a frozen property. The more people touch the project, the more this criterion weighs.
Scoring the Options Side by Side
The table below rates each approach against the six criteria on a five-point scale, where 5 is best for that criterion. The scores are editorial judgments based on typical production work, not measurements, and your weighting of the criteria should change which column wins. A team that hands everything over to editors should weight handover heavily; a solo animator producing one-off pieces should weight art direction and setup time.
| Criterion | Plain keyframes | Inline expressions | Controller rig |
|---|---|---|---|
| Setup time for the first version | 5 | 4 | 2 |
| Cost of the tenth and later versions | 1 | 3 | 5 |
| Handles variable text and content | 1 | 4 | 5 |
| Art direction and hand-shaped motion | 5 | 3 | 3 |
| Preview and render performance | 5 | 4 | 3 |
| Robustness against breakage | 5 | 3 | 3 |
| Readability for the next artist | 4 | 2 | 5 |
| Usable by editors outside After Effects | 1 | 1 | 5 |
Three patterns stand out. First, keyframes win on everything that concerns a single, carefully crafted piece: speed to the first version, control over the feel, performance and robustness. Second, inline expressions are the middle ground and have one conspicuous weakness, readability, because logic is scattered across layers where nobody thinks to look. Third, the controller rig pays a heavy setup cost and then wins every criterion that concerns repetition and handover. The robustness score for the rig assumes it is built with the discipline described later in this guide; a rig built carelessly scores lower than inline expressions, because its failures cascade to every layer that reads from the controller.
Plain Keyframes: When Not Writing Code Is the Expert Choice
It is worth defending keyframes explicitly, because artists who have just learned expressions tend to reach for them everywhere. A keyframe is the most transparent possible record of intent: anyone can see it on the timeline, move it, and reshape its easing in the Graph Editor. It never produces an error. It never slows the preview beyond the cost of the layer itself. And it can carry the kind of nuance, such as a slightly late settle or an asymmetric ease, that makes motion feel designed rather than generated.
Keyframes are also the right choice when the motion is the product. A title sequence, a brand sting or a product hero shot is watched closely and exists once. The time you would spend building a rig is better spent refining curves. Where repetition does appear in such a piece, such as twelve icons that animate in sequence, a common and perfectly acceptable approach is to keyframe one, then copy and offset the others by hand, or use the Sequence Layers keyframe assistant. It is only when you expect to redo that sequence many times that a delay expression starts to pay off.
Pros
- Fully visible on the timeline and in the Graph Editor, with no hidden logic
- Maximum control over timing, easing and character
- No expression errors and no per-frame evaluation cost
- Any After Effects user can edit it without special knowledge
Cons
- Every new version with different text or timing must be adjusted by hand
- Cannot respond to content length, so layouts break with long names or translations
- Repetitive motion across many layers becomes tedious and error-prone to change
- No way to expose simple controls to editors in Premiere Pro
A practical test: if the brief contains the words "template," "series," "versions," "localize," or "editors will update," plain keyframes are unlikely to be the whole answer. If it contains "hero," "launch film," or "one-off," they probably are.
Inline Expressions: Fast Wins and Hidden Costs
Inline expressions shine when a single property needs a behavior that would be tedious to keyframe and the behavior is self-contained. The classic examples are a slow wiggle(0.5, 8) on a camera's position to add handheld drift, loopOut("cycle") on a loader animation, or time * 30 on the rotation of a background element. Each is one line, each is obvious to anyone who clicks the property, and each saves real work.
They also cover small linking tasks well. Pick-whipping a shadow layer's opacity to its parent's opacity, or making a text layer's tracking follow a slider on the same layer, keeps related values in sync without any wider architecture.
Where inline expressions go wrong
The trouble starts when inline expressions multiply. After a few weeks of iteration, a project can accumulate dozens of small expressions, each with its own hard-coded numbers: a 12-pixel padding in one place, a 14-pixel padding in another because someone adjusted it once, a delay of 0.08 seconds in five layers and 0.1 seconds in the sixth. Nobody can change "the padding" or "the stagger" because there is no single place where those values live. This is the hidden-expressions problem the reference material warns about: the logic exists, but nobody can find or edit it without clicking into every layer.
The second failure is copying expressions without understanding them. An expression copied from a forum works in the demo project, then fails silently or behaves oddly in yours because it assumes a layer name, a layer index, a comp frame rate or an anchor point position that you do not share. The rule is simple: if you cannot explain each line of an expression to a colleague, do not ship it in a project someone else will open.
Pros
- Very fast to write for self-contained behaviors such as wiggle, loops and spins
- Logic sits on the property it affects, so small cases are easy to find
- Low setup overhead and no need to plan an architecture
- Handles simple responsive layouts, such as a box fitting its own text
Cons
- Values get hard-coded in many places, so global changes require hunting through layers
- Easy to accumulate undocumented logic that the next artist cannot find
- References to other layers break when names, order or comps change
- Offers nothing to editors working outside After Effects
A good rule of thumb is to allow inline expressions when the number is only ever set once and the expression refers to nothing outside its own layer. The moment a value appears in more than one expression, or someone other than you will want to change it, it belongs on a controller.
Controller Rigs: The Architecture Behind Durable Templates
A controller rig centralizes every adjustable value on one layer, usually a null named something unambiguous like CTRL or Controls, placed at the top of the layer stack and color-labeled so it stands out. Each value is an Expression Controls effect with a descriptive name: Box Padding (Slider), Accent Color (Color), Show Subtitle (Checkbox), Stagger Seconds (Slider), Alignment (Dropdown Menu). Every other layer's expressions read from those controls, so changing Box Padding from 24 to 32 updates every box, background and divider at once.
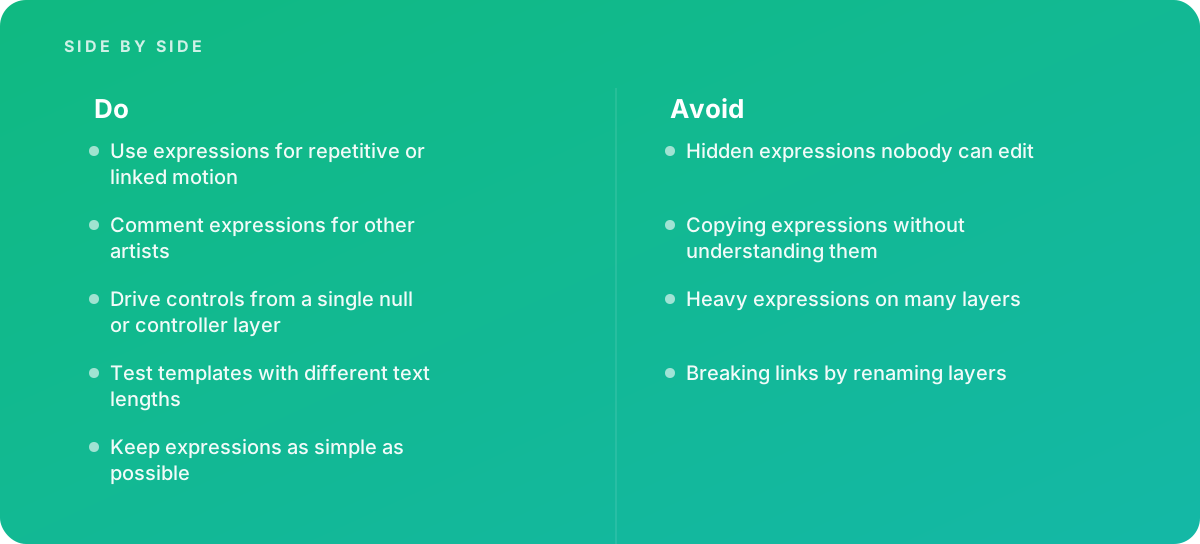
Driving controls from a single null or controller layer is the most important structural habit in expression work, because it converts scattered logic into a documented interface. The controller layer's Effect Controls panel becomes a readable list of what the template can do. When that list is then added to the Essential Graphics panel and exported as a Motion Graphics template (.mogrt), editors get sliders, color pickers and text fields in Premiere Pro, and they never see the code. Our guide to motion graphics templates for editors covers that publishing step and the editor-side testing in detail.
How a well-built rig is structured
- Inputs on the controller only. No expression anywhere else in the comp contains a design number that someone might want to change. Constants that are genuinely fixed, such as a mathematical conversion, may stay inline.
- References made once, at the top of each expression. Declare variables such as const ctrl = thisComp.layer("CTRL"); and const pad = ctrl.effect("Box Padding")("Slider"); then use the variables. If a name changes, there is one line to fix.
- Derived values computed in as few places as possible. If five layers need the width of the title text plus padding, compute it once on a hidden guide layer or a dedicated slider and have the five layers read that result, instead of calling sourceRectAtTime() five times.
- Clamped inputs. Use clamp() so a slider typed as 400 when the design allows 0 to 60 does not destroy the layout.
Pros
- Every adjustable value lives in one named, documented place
- Global changes such as padding, color or timing take seconds
- Can be exposed through Essential Graphics to editors in Premiere Pro
- Scales to dozens or hundreds of versions with consistent results
Cons
- Highest setup time; planning the controls takes longer than animating a single version
- Failures cascade, because a broken controller reference breaks every dependent layer
- Heavy per-layer expressions can slow previews in large comps
- Requires testing against extreme content before it can be trusted
A Worked Example: Pricing a Lower-Third Package Three Ways
The following is an illustrative scenario, not a client project, with numbers chosen to be realistic for a mid-level motion designer. Suppose a company needs lower thirds for a 24-episode interview series. Each episode has roughly six name-and-title supers, so the package covers about 144 lower thirds. Names range from short ("Li Wei") to long ("Alexandra Montgomery-Fitzgerald"), and titles sometimes wrap to two lines. The design has a colored bar, a white box that must fit the text, an accent line and a staggered build-on with a matching build-off.
Approach A: keyframes
The designer builds one master lower third by hand in about three hours. Each subsequent version requires duplicating the comp, typing new text, resizing the box and the accent line, and nudging the keyframes of the build-off so it still reads well. For a practiced artist that might take around 8 to 12 minutes per version, more when a title wraps. Across 143 more versions, that is roughly 19 to 29 hours of repetitive work, with a real risk of inconsistent padding creeping in by episode 10.
Approach B: inline expressions
The designer adds a sourceRectAtTime() expression to the box so it fits its text, and pick-whips the accent line to the box width. Building the master takes perhaps four to five hours. Each version then needs only new text and a quick check, around 2 to 3 minutes, so the remaining 143 versions take roughly 5 to 7 hours. But the padding is hard-coded in three expressions, so when the client asks halfway through for more breathing room, someone has to find and edit all three, and all the rendered versions must be regenerated anyway.
Approach C: controller rig published as a template
The designer spends perhaps eight to ten hours planning controls, writing and commenting expressions, testing with extreme text lengths and publishing a .mogrt. Editors then place the template directly in their Premiere Pro timelines and type names into text fields, at perhaps a minute per super, which they would spend placing a graphic in any case. The padding change becomes a single slider edit and a republish. The designer's total time on the package is the setup plus occasional support.
| Illustrative package (144 lower thirds) | Keyframes | Inline expressions | Controller rig and template |
|---|---|---|---|
| Master build | About 3 hours | About 4 to 5 hours | About 8 to 10 hours |
| Time per additional version | 8 to 12 minutes | 2 to 3 minutes | About 1 minute, by the editor |
| Motion designer hours, total | Roughly 22 to 32 | Roughly 9 to 12 | Roughly 8 to 10, plus support |
| Cost of a global design change | Redo every version | Edit several expressions, re-export all | One slider, republish template |
| Consistency risk | High | Medium | Low, if tested |
The numbers will shift with the artist and the design, but the shape of the result is stable: the rig costs about three times as much to build as the keyframed master and still finishes with fewer total hours once versions pass a few dozen. If the same package were only six lower thirds for one video, the keyframed approach would win outright, at roughly four hours total against eight or more for the rig.
Recommendations by Scenario
Scores and worked numbers are useful, but most teams recognize their situation faster from a description. Here are the four scenarios we see most often and what we recommend in each.
Scenario 1: A one-off brand film or hero animation
The piece is watched closely, art-directed in review rounds and delivered once, perhaps with a couple of aspect-ratio variants. Reuse is low, content is fixed, and the feel of the motion is the whole point. Use keyframes for everything that carries character. Allow a small number of inline expressions for genuinely procedural details, such as a subtle wiggle on a camera or a loopOut on a background element, and comment each one.
Verdict Keyframes first, with a few commented inline expressions for procedural details. Do not build a rig for a piece that will never be versioned.
Scenario 2: A recurring series, social campaign or localized content
This is the lower-third case above, or a batch of social posts across three aspect ratios and five languages. Text length is unpredictable, the same design will be produced many times, and changes requested midway need to propagate everywhere. Here the controller rig is clearly worth its setup. Build responsive layout with sourceRectAtTime(), stagger timing from a single slider, and test with the longest string any language might produce, since German and Finnish product names can run far longer than their English equivalents. For text-heavy builds, pair the rig with the techniques in our guide to getting text animators in After Effects right, since range selectors often do the per-character work more efficiently than expressions on separate layers.
Verdict Build a controller rig. Centralize every design value, test with extreme text lengths and multiple aspect ratios, and budget setup time as an investment that pays back after a few dozen versions.
Scenario 3: Templates handed to editors or clients
The people changing the content will not open After Effects, or will open it without expertise. Handover dominates every other criterion. Build a controller rig, publish its controls through Essential Graphics, name every property in plain language ("Name," "Job title," "Brand color," not "Slider 3"), and lock or hide everything else. Test the .mogrt inside Premiere Pro, on a machine that did not build it, before delivery. Our guide to After Effects project organization covers the folder and naming structure that makes the source project understandable when a template eventually needs a change.
Verdict A controller rig published as a Motion Graphics template, with plain-language control names, clamped inputs and editor-side testing. Anything less creates support calls.
The fourth scenario is a quick internal job: a looping background for a trade-show screen, a spinning badge for a social post, a placeholder animation for a pitch. Inline expressions are ideal here, because speed matters more than handover and the project is unlikely to be reopened. Even so, a two-word comment costs nothing and saves the colleague who does reopen it.
Writing Expressions Other Artists Can Maintain
Whichever approach wins, the expressions themselves should be written for a reader. After Effects expressions accept standard JavaScript comments: // for a single line and /* ... */ for a block. Use them.
A commenting convention that works
- First line states purpose. For example: // Fits box width to title text plus padding from CTRL.
- Name the inputs. List which controller effects the expression reads, so someone renaming a control knows what depends on it.
- Explain any number that is not obvious. // 0.5 = anchor at center of box saves a debugging session.
- Mark edits. If you modify an inherited expression, add initials and a short reason. It is a small courtesy that makes a project's history legible.
Keep expressions as simple as possible
Simplicity is both a readability rule and a performance rule. Prefer built-in interpolation methods such as linear(), ease(), easeIn() and easeOut() over hand-written math; they are shorter, well documented and understood by anyone who has read the reference. Prefer one clear expression per property over clever chains that compute several things at once. If an expression grows past 20 or 30 lines, ask whether part of it belongs on a controller slider, a guide layer, or in a script that runs once.
Reference layers defensively
Expressions refer to layers by name, such as thisComp.layer("CTRL"), or by index, such as thisComp.layer(1). Names are more readable and survive layer reordering; indexes survive renaming but break silently when someone drags a layer up the stack. Recent versions of After Effects try to update expression references when you rename a layer, effect or comp inside the project, but that safeguard does not cover every case. References built from strings, expressions pasted in from another project, and precomps replaced with differently named versions can all leave broken links behind. The safest practice is to name controller layers and controls early, treat those names as fixed once the rig is built, and use thisLayer and thisComp for self-references rather than naming the current layer explicitly.
Keep in mind that an expression error disables the property it sits on and shows a warning bar at the bottom of the Composition panel. In a controller rig, one broken reference on the controller can disable every dependent layer at once, so after any rename or replacement, scrub the full comp before rendering.
Keep expression-heavy projects fast
Because expressions are evaluated on every frame, their cost is multiplied by the number of layers and frames. Heavy expressions on many layers are among the most common reasons a template that felt quick with ten layers crawls with two hundred. The following habits keep that cost manageable.
- Compute once, read many times. If fifty layers need the same derived value, compute it on one layer or slider and have the others read that property. Reading a property is much cheaper than recomputing an expensive result fifty times.
- Avoid loops over the whole comp on every frame. An expression that iterates through thisComp.numLayers to find something is fine on one layer and costly on a hundred.
- Be careful with valueAtTime in loops. Sampling a property at many times per frame, for example to build a trail, multiplies cost quickly.
- Use posterizeTime where the look allows. posterizeTime(12) evaluates an expression at 12 frames per second, which suits stepped or stylized motion and reduces work.
- Convert when the design is final. Keyframe Assistant's Convert Expression to Keyframes bakes an expression's result into keyframes. For a locked delivery, this removes the per-frame cost and the risk of breakage, at the price of flexibility, so keep an unbaked copy of the comp.
- Disable, do not delete, while diagnosing. The equals-sign toggle beside an expression turns it off temporarily, which is the quickest way to find which expression is slowing a preview.
Expressions are only one factor in preview speed; effects, motion blur, 3D layers and resolution all contribute. When a project involves many particles or 3D elements, the balance shifts again, as discussed in our guide to 3D in motion graphics.
Testing a Rig and Catching Handover Mistakes
A rig that works with the demo text is not tested. Testing templates with different text lengths is the step most often skipped and the one that catches most failures. A practical test pass looks like this.
- Extremes of content. Try the shortest plausible input (a single character, or an empty field), the longest plausible input, and something beyond it. Include descenders, accented characters, all caps, and a two-line title if the design permits wrapping.
- Extremes of every control. Push every slider to its minimum and maximum, toggle every checkbox, pick every dropdown option. Confirm that clamping holds and nothing overlaps or disappears.
- Timing changes. Change the comp or layer duration and confirm build-offs still land correctly. Expressions that rely on outPoint rather than a fixed time survive this; hard-coded times do not.
- Different frame rates and aspect ratios. If the template will be used at 25, 29.97 and 30 fps, or in 16:9, 1:1 and 9:16, test each. Expressions that count frames rather than seconds will drift.
- Another machine and another user. Open the project, or the exported .mogrt, on a machine that lacks the builder's fonts and plug-ins. Missing fonts change text metrics, which changes every sourceRectAtTime() result.
- A preview-speed check. Time a RAM preview of the full comp. If it is noticeably slower than a keyframed equivalent, find the heaviest expression before delivery.
Color and output settings are outside the scope of expressions but inside the scope of a template that will be used across projects; see our guide to color management in After Effects before publishing a template whose brand colors must match exactly.
Mistakes that make expression work hard to hand over
Most expression problems in inherited projects trace back to a short list of habits. Recognizing them in your own work is the fastest way to raise the quality of what you hand over.
- Hidden expressions nobody can edit. Logic buried on a property deep inside a precomp, with design values hard-coded, is effectively locked. Surface every adjustable value on a controller and note in the project where rigs live.
- Copied expressions nobody understands. Expressions pasted from tutorials often carry assumptions about names, frame rates or anchor points. Read every line, rename variables to fit your project and remove anything you do not need.
- Heavy expressions on many layers. The same expensive calculation repeated on every layer is a performance problem waiting for a larger comp. Compute once and share.
- Breaking links by renaming layers. Treat controller and referenced layer names as fixed once the rig is built, and check the comp after any rename or precomp replacement.
- Using code where keyframes would do. An expression that approximates a curve an animator could draw in the Graph Editor in two minutes is harder to direct and harder to change.
- No record of the engine. If a project depends on the Legacy ExtendScript engine, note it in the project, because a colleague switching it to JavaScript will see errors without knowing why.
The same discipline applies to neighboring techniques. Procedural effects such as those in our guide to glitch and distortion effects frequently rely on wiggle and random expressions; seeding them with seedRandom() keeps the result repeatable between renders, which matters when a client approves a specific frame.
When to Bring In Specialist Help
Most in-house designers can and should learn inline expressions; wiggle, loopOut, pick-whip linking and a simple sourceRectAtTime() box cover a large share of everyday needs. The point to bring in help is when you are building templates or complex rigs that other people will depend on: a lower-third system for a whole brand, a set of .mogrt files for an editing team, a data-driven chart package, or a character or UI rig with many linked parts. Those jobs reward experience with architecture, naming, testing and performance more than fluency in any single function.
A specialist engagement should leave you with more than working files. Expect a controller layer with plainly named controls, commented expressions, a short written note on how the rig works and what not to rename, test renders at the content extremes, and the source project organized so another artist can extend it. If you are weighing that kind of work, our animation and motion graphics service builds and documents template systems with exactly that handover in mind.
A useful standard: an expression is only finished when someone other than its author can find it, understand it and change it without breaking the project. The decision itself is not complicated once the criteria are on the table. Keyframe what is crafted once. Use inline expressions for small, self-contained procedural behavior. Build a controller rig for anything that will be versioned, localized or handed to someone else, and invest the time to comment, clamp and test it. Done that way, expressions stop being a source of mystery in inherited projects and become the most reliable part of them.
Where this comes from
- Adobe Help Center — Expression basics
- Adobe Help Center — Expression language reference
The figures and practices above come from the sources listed.
Working on something like this?
We take on Motion Graphics & Animation work for teams who want it done once, properly. Tell us what you are building and we will tell you honestly whether we are the right studio for it. Start a project.
Where to go next
Spotted something wrong? Report an error on this page. We correct on the page and say what changed.