Walk Cycles, Done Properly
Learn how to build walk cycles that hold up: block key poses, put weight in the down, lock the feet, rotate hips and shoulders, and loop without a pop.
 Tomas Lindqvist
Walk cycles are the repeating animation of a character taking two steps, left then right, built so the last frame flows back into the first and the loop can run for as long as a shot needs it. Every walk cycle rests on four key positions: contact, down, passing and up. Get those four right, space them sensibly, and you have a walk. Get them wrong, and no amount of polish in the in-betweens will hide feet that skate, a torso that floats, or a loop that hiccups every second.
This guide is for two groups. The first is marketers, producers and in-house teams commissioning character animation for explainers, product films, social series or presentations. They need to know what a finished walk should look like and what to ask for. The second is animators and motion designers who want a working method they can use on a rig tomorrow morning. The walk is a standard test of both rigging and timing. It reveals character faster than almost any other action, and once built it tends to be reused across dozens of scenes. That reuse is exactly why it deserves care: a flaw in a cycle is a flaw repeated every time the character crosses the frame.
The guide is organized as a checklist. The master list comes first. Each section after it takes one item, explains why it matters and describes how to do it well, with frame numbers, spacing math and the specific failure you are guarding against.
Use this list as a production gate. An animator can run through it before handing a cycle to compositing, and a producer can use it as a review sheet when a cycle comes back for approval. Each item is covered in detail in the sections below.
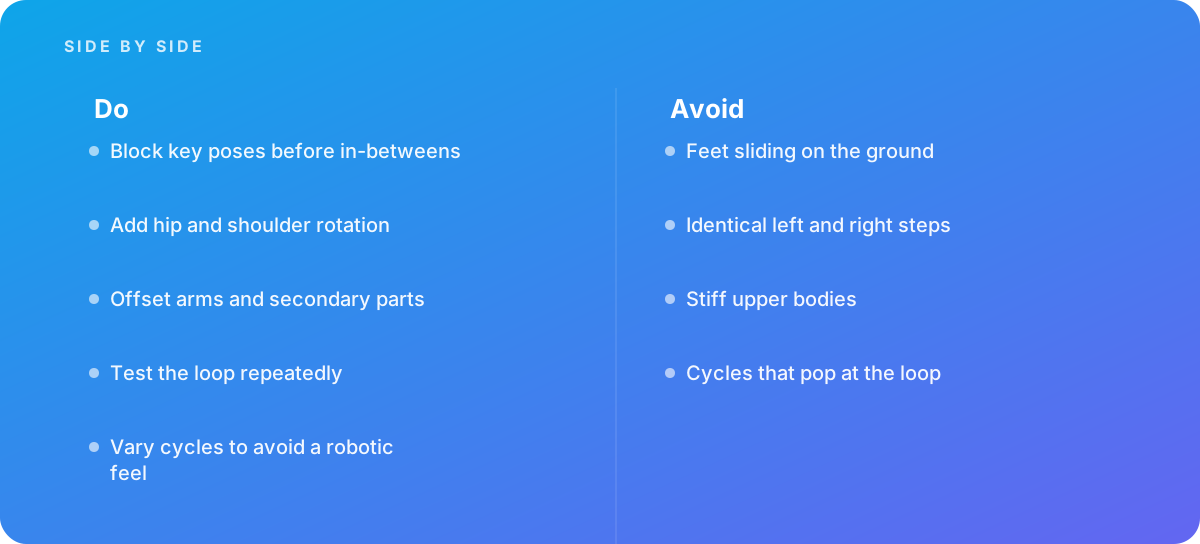
- Character, tempo and purpose are defined before any keys are set: who is walking, how fast, and whether the cycle travels or stays in place.
- The four key poses (contact, down, passing, up) are blocked for both steps before any in-betweens are added.
- Cycle length is chosen deliberately, commonly around 24 frames at 24 fps for a natural walk, with the reason written down.
- The down pose carries the weight: the body is at its lowest just after the heel strikes, with the knee bent to absorb it.
- Planted feet do not slide: foot travel is locked to the body's forward speed, or to a constant backward speed on an in-place cycle.
- Hips and shoulders rotate and tilt against each other, so the upper body is never stiff.
- Arms, head and secondary parts are offset from the main action rather than hitting their extremes on the same frame as the legs.
- The left and right steps are not mirror copies; small asymmetries keep the walk from looking mechanical.
- The loop has been played back repeatedly, at speed, with no pop, stall or twitch where the last frame meets the first.
- Variants exist for different moods or speeds so a series does not repeat one identical cycle everywhere.
Ten items looks like a lot for something that lasts one second. In practice most of them take minutes once the method is familiar. The time goes into the two or three that expose weak rigs or rushed timing: foot contact, weight and the loop seam.
Define the character, the tempo and the job of the cycle
Before you touch a key, answer three questions. Who is walking? How fast are they going? What does the cycle need to do in the edit? The answers set nearly every number that follows, and skipping them is the most common reason walks get re-animated late in a project.
Who is walking
A walk is a personality test. A confident executive in a product film, a nervous first-time user in an onboarding explainer and a bouncy mascot in a social loop should not share a walk, even if they share a rig. Write two or three adjectives for the character and turn each one into a physical instruction. "Confident" might mean a slightly longer stride, chest forward and a small head bob. "Nervous" might mean a shorter stride, shoulders raised and arms held closer to the body. "Bouncy" might mean an exaggerated up pose and a quicker tempo. These choices start at the design stage. Proportions, leg length and costume all limit what a walk can do, which is why it helps to settle them early, as described in our guide to designing characters for animation.
How fast
Tempo is expressed as frames per step. At 24 fps, a cycle of about 24 frames gives 12 frames per step, or two steps per second. That reads as a natural, unhurried walk for an adult-proportioned character. Shorter cycles read as brisk or hurried. Longer ones read as tired, careful, heavy or relaxed. The exact thresholds depend on the character's proportions and style, so treat 24 frames as a starting point, not a rule. If your project runs at a different frame rate, work out the tempo in seconds first and then convert it. A two-steps-per-second walk at 30 fps is 15 frames per step. The trade-offs between frame rates, and how to choose timing that survives conversion, are covered in frame rate and timing for animation.
What the cycle has to do
Decide early whether the cycle will travel across the frame, stay in place under a moving background or camera, or be exported as a looping asset for reuse. That decision changes how you handle foot contact, and it is the key trade-off discussed later in this guide. Also write down where the cycle will be seen. A walk viewed from the side in a wide shot shows every foot slip. A three-quarter view at mid-shot hides some foot problems but exposes shoulder and hip mechanics. A walk that will be cropped for a vertical social format may lose its feet entirely, which changes where you spend your polish time.
Tip: Put the brief for the cycle in one line at the top of the scene file or in a layer name, for example: "Maya, confident, 24-frame cycle at 24 fps, in place, side view, reused in episodes 1 to 6." Anyone who opens the file months later will know what the walk was built for before changing it.
Block contact, down, passing and up before any in-betweens
The single most useful discipline in walk animation is to block the key poses first and hold off on in-betweens until those poses read correctly on their own. Blocking in stepped or held keys lets you judge the poses without software interpolation blurring the problems. Every major animation package supports this. Blender's documentation on keyframes and interpolation modes explains how to switch between constant, linear and Bézier interpolation, and 2D tools offer the equivalent through held frames or classic tweens.
The four positions and what each one does
- Contact
- The front heel touches the ground and the back toe is about to leave it. Both legs are at their widest, so this pose shows the stride length. It is the pose most people picture when they think of a walk.
- Down
- The front foot flattens and the front knee bends to take the body's weight. The body drops to its lowest point. This is where the sense of weight lives.
- Passing
- The supporting leg is roughly straight under the body and the free leg swings past it, knee bent and foot lifted clear of the ground. The two legs cross.
- Up
- The supporting leg pushes off from the toe and the body rises to its highest point, just before falling forward into the next contact.
A common frame layout for a 24-frame cycle
For a 24-frame cycle, a widely used layout places the first contact on frame 1, the down on frame 4, the passing on frame 7, the up on frame 10, the opposite contact on frame 13, then down on 16, passing on 19 and up on 22. Frame 25 is identical to frame 1 and is not rendered. The spacing is even, three frames apart, which gives a neutral walk. You can then shift the down and up poses a frame earlier or later to change the rhythm. Moving the down pose closer to contact makes the weight land harder. Moving the up pose later gives a lazier push-off.
- Set the two contacts Key frame 1 and frame 13 as mirror contacts, and copy frame 1 to frame 25 so the cycle closes. Check stride length against the character's leg length. An overlong stride looks like lunging.
- Add the passing poses Key frames 7 and 19. Make sure the swinging foot clears the ground and the supporting leg is under the center of mass.
- Add the downs Key frames 4 and 16 with the body at its lowest and the front knee bent. Compare the height against the contact pose.
- Add the ups Key frames 10 and 22 with the body at its highest and the back foot rolling onto its toe.
- Review in stepped mode Play the eight poses as a flipbook. If the walk does not read as a walk now, in-betweens will not rescue it.
- Only then add in-betweens Switch to spline or tweened interpolation, or draw breakdowns, and start refining arcs and spacing.
In hand-drawn and frame-by-frame work the same logic applies, but the cost of changing a pose late is much higher, because every drawing that depends on it must be redrawn. That is one reason the blocking stage deserves extra time in traditional pipelines, as discussed in frame-by-frame animation: what actually works.
Put the weight in the down pose
A walk without weight looks like a character floating along a rail. Viewers read weight mainly from the down pose, the moment just after heel strike when the body sinks and the leg bends to absorb the impact. Getting this pose right does more for believability than any other single change.
How to build a convincing down
Start with the hips, or root, because the rest of the body follows them. In a natural walk the root traces a gentle wave: lowest at the down, rising through passing, highest at the up, and falling back into contact. Plot that vertical curve in your graph editor and look at its shape. It should be smooth and regular, with two low points and two high points per cycle, one for each step. A flat line means no weight. A saw-tooth means the character is bouncing mechanically.
The amount of drop is a character choice. A heavy character or one carrying something sinks further and stays down longer. A light, springy character barely dips and rises quickly. Use the character's own proportions as a ruler rather than an absolute number. Compare the drop to the height of the head, for example, and keep that ratio consistent across the character's other cycles so they feel like the same body.
The bent knee and the flattening foot
The front knee should bend visibly in the down pose, and the front foot should roll from heel to flat over the two or three frames after contact. If the foot slaps down flat on the contact frame, the walk reads as stomping. That may be exactly right for an angry or clumsy character, but it is wrong as a default. In a rig with foot-roll controls, animate the roll explicitly rather than hoping the IK will produce it.
Tip: Turn off every layer except the root and the legs and play the cycle. If you cannot feel the weight landing with the upper body hidden, adding arms and head will not fix it. The weight has to be in the legs and hips first.
Lock the feet: no sliding on the ground
Foot sliding is the most visible walk-cycle mistake and the one clients notice first, even when they cannot say what is wrong. A planted foot must stay fixed relative to the ground for as long as it carries weight. If it drifts forward or backward while the body moves, the character appears to be walking on ice.
Traveling walks
When the character actually moves through the scene, the rule is simple: a planted foot does not move at all in world space from heel strike until it lifts at the toe. The body's forward travel has to match the stride, meaning the distance the root covers during a step equals the distance between the feet at contact. If the root moves too fast, the feet appear to be dragged backward. If it moves too slowly, they appear to be pushed forward.
In-place walks
On an in-place cycle, where the character stays centered and the background moves, the planted foot must slide backward at a constant speed that exactly matches the background's speed. Here is the math for a 12-frame step. If the stride, the distance between heels at contact, is 60 units, the planted foot must travel 60 units backward over 12 frames, which is 5 units per frame. The background or ground plane must move at the same 5 units per frame. Use linear interpolation on the planted foot's horizontal translation during its contact phase. Any easing will make the foot speed up and slow down against a constant-speed ground, and that reads as slipping.
Tools that help
In 3D, IK legs with foot-roll and pivot controls, plus a ground-plane grid you can read against, make locking feet much easier. In Blender you can also inspect the foot controller's curves in the graph editor and confirm the translation is flat or perfectly linear during contact. In 2D and puppet rigs, onion skinning with a fixed ground-line guide lets you check the heel position against the previous frame. A rig that makes foot contact hard to control is a rigging problem, not an animation problem, and it is worth fixing before animating dozens of cycles on it. Our practical guide to 2D character rigging covers the controls that make this easier.
Warning: Foot slide often creeps in late, when an animator adjusts the root timing to change the tempo or smooths curves with a global filter. Re-check foot contact after every timing change, not only when the cycle is first built.
Rotate the hips and shoulders against each other
A stiff upper body is the second most common complaint about walks, and it usually comes from animating the legs thoroughly and then carrying the torso along as one rigid block. Real walking involves continuous counter-rotation. As the right leg swings forward, the pelvis turns so the right hip moves forward, and the shoulders turn the opposite way so the left shoulder comes forward with the left arm. That twist through the spine is a large part of what makes a walk look alive.
Three axes of hip motion
- Rotation around the vertical axis. The hip on the side of the swinging leg moves forward. Seen from above, the pelvis rotates back and forth once per cycle.
- Tilt from side to side. In the passing pose the hip on the side of the free leg drops slightly, because the supporting leg carries the weight. Seen from the front, the pelvis rocks.
- Side-to-side shift. The body's weight moves over the supporting foot. The root shifts slightly toward whichever leg is planted, which is most visible from the front.
The shoulders answer the hips
Animate the shoulders as a mirror of the hips with lower amplitude. When the pelvis rotates one way, the chest rotates the other. When the pelvis tilts down on one side, the shoulders tend to tilt the opposite way. Keep the amounts subtle for a natural walk and push them for stylized characters. A strutting or swaggering character is largely a walk with exaggerated hip and shoulder rotation.
Check the torso from more than one view. Side views hide rotation around the vertical axis almost completely, so a walk that looks fine in profile can look robotic from three-quarters. If the cycle will only ever appear in profile, as in some 2D explainers and isometric scenes, you can reduce the work. But it is still worth adding a little shoulder motion, which reads as life even in a flat side view. Isometric walks bring their own constraints on angles and foot placement, which are covered in our practical guide to isometric animation.
Offset the arms, head and secondary parts
If the arms, head, hair and clothing all reach their extremes on the same frames as the legs, the result looks mechanical, as if every part were driven by one crankshaft. Offsetting secondary motion by a frame or two so it follows the main action is what gives a walk its flow.
Arms
The arms swing opposite to the legs: left arm forward with the right leg. A useful starting point is to key the arm extremes at the contact poses and then shift those keys one or two frames later, so the arms appear to be pulled along by the shoulders rather than driving the walk. Swing the arms on arcs, not straight lines. Check the arc of the wrist in the viewport or with an onion skin. Let the elbow and wrist trail the upper arm slightly, especially on the forward-to-back reversal, which softens the change of direction.
Head
The head follows the body's up-and-down motion but lags slightly behind it, and it should work to keep the eyes fairly level. A head locked rigidly to the chest bobs mechanically. A head that counters a little of the vertical motion and settles a frame later reads as a person looking where they are going. For a character who is looking at something specific, anchor the gaze and let the head rotate to maintain it through the cycle.
Hair, clothing, props and tails
Secondary parts follow the offset principle more strongly. A ponytail, a coat hem or a bag strap should lag the body by several frames and overshoot on direction changes. Because the cycle loops, any offset you add must also loop cleanly. If you shift a secondary channel's keys later in time, the keys that fall past the end of the cycle have to wrap round to the start. In Blender, a Cycles modifier on the F-curve handles this automatically. In other tools you may need to copy the overflowing keys to the start of the cycle manually.
Break the symmetry between left and right steps
Because a cycle is built from two steps that mirror each other, it is tempting to animate the left step and then copy and mirror it for the right. That saves time, and it is a reasonable way to block. Left as it is, though, a perfectly mirrored walk looks robotic. No one walks with perfect symmetry, and viewers pick it up even when they cannot name it.
Where to introduce asymmetry
- Arm swing. Let one arm swing a little wider or further forward than the other. Handedness, a bag on one shoulder or a phone in one hand all justify it.
- Head tilt. A slight constant tilt, or a head that turns a little further on one side, gives the walk an attitude.
- Foot placement. A small difference in how one foot lands, whether a little more toe-out or a slightly shorter step, is realistic and hard to spot individually but adds up to naturalness.
- Timing. Shifting one side's down pose by a single frame can make the walk feel less metronomic without breaking the loop.
Keep the asymmetry small unless it is a character point. A limp or an injury is asymmetry turned all the way up and becomes the subject of the walk. For most characters you want differences the viewer feels rather than sees. After breaking symmetry, check that the root still returns to its starting position at the end of the cycle. Uneven steps can make an in-place character drift sideways or forward over many loops.
Make the loop seamless, then test it relentlessly
A cycle that pops at the loop point is worse than no cycle, because the pop repeats every second for as long as the character walks. The rule is simple and absolute: the last frame of the cycle must flow into the first exactly as any other frame flows into the next.
The off-by-one problem
The most common cause of a pop is a duplicated frame. If frame 1 and frame 25 hold the same pose and you render or export frames 1 through 25, the pose is shown twice at every loop and the character stalls briefly. The fix is to key frame 25 as a copy of frame 1, so the interpolation into the loop is correct, and then render only 1 through 24. The reverse error also happens. If the cycle is closed on frame 24 rather than 25, the step from 24 back to 1 is missing a frame and the character jerks forward.
Tangents at the seam
Matching poses is not enough. The curves must also match in slope as they cross the seam. If the root's vertical curve eases out at frame 1 but arrives at frame 25 at full speed, the motion will visibly hitch at the loop even though the poses are identical. Graph editors that support cyclic extrapolation show the curve continuing past the end of the cycle, which makes a mismatched tangent obvious. Blender's Cycles modifier and "Make Cyclic" extrapolation are designed for exactly this. In 2D tools, Adobe's documentation for Animate explains how graphic symbols can be set to loop within a timeline, which is a common way to reuse a cycle across a longer scene.
How to test
- Play the cycle looped at full frame rate for at least ten repetitions. Many problems only show after several loops.
- Watch one body part at a time: the root, then each foot, then each hand, then the head. A pop in a single channel is easy to miss when watching the whole character.
- Scrub back and forth across the seam frame by frame and compare spacing with the rest of the cycle.
- Test the cycle in context against its moving background or on its path, because a seam that is invisible in isolation can show against a scrolling ground.
- Export a short test render in the delivery format. Compression and frame-rate conversion can expose problems that the viewport hides.
In-place cycles versus traveling walks
The key production decision for any walk is whether the character walks on the spot while the world moves, or actually travels through the scene. Both are legitimate, and professional work uses both. The choice affects how feet are locked, how the cycle is reused and how easy the shot is to change later.
Pros
- In-place cycles are self-contained and easy to reuse across scenes, templates and episodes.
- They can be exported as looping assets for web, apps or presentations and dropped onto any background.
- Camera moves and background scrolls can be adjusted in the edit without re-animating the character.
- They are well suited to side-scrolling and parallax compositions, where the ground moves at a single constant speed.
Cons
- The ground or background speed must match the foot slide exactly, or the character appears to skate.
- They are hard to use when the character must turn, stop, change speed or interact with objects in the set.
- They can look repetitive over long durations unless variants are rotated in.
- Converting an in-place cycle to a traveling one later requires re-solving foot contact against world space.
A practical rule: build in place when the walk will be reused, looped as a standalone asset or placed against a scrolling background. Build a traveling walk, or convert the cycle to travel, when the character must interact with the set, start and stop, turn corners or share the shot with other characters who need to line up with them. Many productions do both, building the in-place master cycle first and deriving traveling versions from it by adding root translation and locking the feet.
If an in-place cycle will be exported as a standalone looping asset, perhaps for a website hero or a presentation, the delivery format matters as much as the animation. A walk that must sit over live backgrounds needs an alpha channel, which is covered in a practical guide to transparent video and alpha channels. A cycle that will play in the browser needs a frame rate that the target devices can sustain. See frame rates for web animation for the trade-offs.
Worked example: planning walk cycles for an explainer series
The following example is illustrative. It is not a real client project, but the numbers are realistic and show how the checklist turns into a production plan.
A software company commissions six short explainer episodes, each about 90 seconds long, animated at 24 fps. Two recurring characters appear throughout: Maya, a confident product lead, and Sam, a new user who is often rushing or confused. Across the series, the storyboards call for roughly 50 seconds of Maya walking and 70 seconds of Sam walking. Most shots are side-on against a scrolling office background, and a few three-quarter shots have characters walking toward camera.
Step 1: count frames of walking
At 24 fps, 50 seconds of Maya walking is 1,200 frames and 70 seconds of Sam is 1,680 frames. If every walk used one 24-frame cycle, Maya's cycle would repeat 50 times and Sam's 70 times across the series. That is enough repetition for attentive viewers to notice, particularly in the longer walking shots.
Step 2: design the variants
The team plans cycles by character and mood rather than one cycle each.
| Cycle | Frames at 24 fps | Steps per second | Character notes | Planned screen time |
|---|---|---|---|---|
| Maya, standard | 24 | 2.0 | Chest forward, moderate hip rotation, relaxed arm swing | 35 seconds (35 loops) |
| Maya, presenting | 28 | About 1.7 | Slower, head turned toward camera, one arm gesturing | 15 seconds (about 13 loops) |
| Sam, standard | 24 | 2.0 | Shorter stride, shoulders slightly raised, arms closer to body | 30 seconds (30 loops) |
| Sam, hurrying | 16 | 3.0 | Forward lean, quick down poses, exaggerated arm pump | 25 seconds (37.5 loops) |
| Sam, hesitant | 32 | 1.5 | Long down holds, head scanning, small uneven steps | 15 seconds (about 11 loops) |
Two details in the table deserve attention. First, a 16-frame cycle gives 8 frames per step, so the contact, down, passing and up poses for Sam's hurrying walk have to fit into 8 frames each. The team blocks them on frames 1, 3, 5 and 7 of each step, with only two frames between key poses. Second, the "37.5 loops" figure means the shot lengths for Sam's hurrying walk do not divide evenly into the cycle. That is fine for a character walking out of frame, but where a shot must end on a specific pose, the editor needs to know the cycle's frame count so cuts land on the contact.
Step 3: check the foot-slide math
Maya's standard cycle has a stride of 60 units at the scale of the side-view layout and 12 frames per step, so the scrolling office background must move at 5 units per frame. Sam's hurrying cycle has a slightly longer stride of 64 units at 8 frames per step, so his background must move at 8 units per frame. The team writes both figures into the shot notes so the compositor sets the background scroll speed to match. Getting it wrong would reintroduce foot slide, even though the cycles themselves are clean.
Step 4: plan the traveling versions
The three-quarter shots toward camera cannot use the in-place side cycles, so the team derives traveling versions of Maya's and Sam's standard walks. They add root translation along the camera axis and lock feet in world space. Because the rig and cycles are built to be reused, these derivations take a fraction of the time the originals did. The trade-offs involved in building for reuse are covered in reusing rigs and templates.
Step 5: review against the checklist
Each cycle goes through the master checklist before approval. The producer reviews the three items most visible to a non-animator: foot contact against the background, the loop seam over ten repetitions, and whether each character's variants feel like the same person in different moods. The lead animator signs off on the rest.
Vary your cycles so a series does not feel robotic
Even a flawless cycle becomes noticeable when it repeats identically for a minute of screen time. The good-practice rule is to vary cycles, and variation works at three levels.
Variant cycles
As in the worked example, build separate cycles for different moods and speeds. A standard, a hurried and a tired walk for each principal character is a sensible baseline for a series. Each variant should change several parameters together: tempo, stride, weight, posture and arm behavior. A hurried walk that is only a sped-up version of the standard one looks like fast-forward, not urgency.
Layered variation on a single cycle
For long walks, layer small non-cyclic changes on top of the cycle: a head turn toward something in the scene, a hand adjusting a bag, a brief change of pace. In 3D packages this can be done with animation layers or non-linear editing tools that stack a one-off action over a looping base. In 2D, it usually means swapping the head or arm to a separate animated element for a few seconds.
Transitions in and out
Characters rarely walk from the very first frame of a shot to the very last. Plan for the start and stop. The first step from standing and the settle into a standing pose are separate pieces of animation, and they are where a cycle is most likely to look pasted in. Budget time for them rather than cutting the walk off mid-stride.
For series with seasonal or campaign variants, such as a mascot who walks through different branded environments, the same cycles can often be reused with costume and prop swaps. The planning considerations are covered in seasonal campaign variants.
When to bring in specialist help
A single walk for a single shot is well within reach of a capable motion designer who follows the checklist above. The picture changes when characters must move naturally across a series. At that point, walks become a system: a rig that has to support many cycles, a library of variants, rules for foot-slide math and loop handling that every animator on the project follows, and review standards that stay consistent over months.
Signs you need a character animation specialist
- The characters will walk in many shots across multiple episodes or campaigns, and consistency matters to the brand.
- Walks must be seen from several angles, not only in profile, which exposes hip, shoulder and foot mechanics.
- The rig was built by someone else and foot contact or hip controls are proving difficult to animate cleanly.
- The walk has to convey specific character traits, such as age, confidence, injury or a stylized gait, rather than generic movement.
- Cycles need to be delivered as reusable assets for web, apps or presentation templates, with correct looping and alpha handling.
What to ask for
When commissioning walks, ask for playblasts or test renders of each cycle looped at least ten times, in the delivery frame rate, from each camera angle that will be used. Ask for the frame count and stride speed of each in-place cycle to be documented, so compositors and editors can match backgrounds and cut points. Ask how the studio handles variation across a series. If you are evaluating partners, our guide to choosing an animation studio covers the wider questions, and our animation and motion graphics service describes how we approach character work for series.
Verdict Good walk cycles come from order and discipline more than talent: define the character and tempo, block the four key poses, put the weight in the down, lock the feet, twist the hips and shoulders, offset the secondary motion, break the symmetry and test the loop until it disappears. Build in place when the walk will be reused, build traveling walks when the character must interact with the world, and plan variants from the start whenever a character will walk across a whole series.
Where this comes from
- Blender Foundation — Blender Manual: Animation
- Adobe Help Center — Animate User Guide
The figures and practices above come from the sources listed.
Working on something like this?
We take on Motion Graphics & Animation work for teams who want it done once, properly. Tell us what you are building and we will tell you honestly whether we are the right studio for it. Start a project.
Where to go next
Spotted something wrong? Report an error on this page. We correct on the page and say what changed.