Resampling Methods, Done Properly
A phase-by-phase playbook for resampling images: choosing bicubic, nearest neighbor or Preserve Details 2.0, sharpening after resizing, and checking at 100%.
 Imogen Clarke
Every time an image changes size, software has to invent pixels. Shrink a 6,000-pixel-wide product shot to 1,200 pixels and four out of every five columns of data disappear; enlarge a 1,000-pixel logo to 3,000 pixels and roughly eight out of nine output pixels never existed in the file. The algorithms that decide what those new pixels look like are called resampling methods, and choosing between them is one of the quiet decisions that separates crisp, trustworthy images from soft, jagged or crunchy ones.
This matters to anyone who publishes images at more than one size: ecommerce teams generating thumbnails, zoom views and marketplace variants; marketers repurposing a campaign visual for print, social and email; developers wiring up image pipelines; and retouchers handing off masters that other people will resize for years. The damage from a poor choice is most visible exactly where it hurts: stitching and texture on products, small type on packaging and screenshots, fine hair and jewelry edges, and pixel art that is supposed to stay blocky.
What follows is a playbook, not a glossary. It walks through the work in the order you should do it, from auditing your originals to checking the final files at 100 percent, with the goal, actions, outputs and checks for each phase. Follow it once on a real batch and you will have a documented, repeatable resizing standard your whole team can use.
The Resampling Playbook at a Glance
Resampling is not a single step you perform at export. It is a chain of decisions that begins with which file you start from and ends with how a browser or printer finally renders the pixels. Treating it as a chain is what prevents the most common failure: a perfectly resized image that was made from the wrong source, sharpened at the wrong moment, or rescaled again by a web page that nobody checked.
- Audit originals and targets Find the largest, least-compressed source for each image and list every output size it must serve, in pixels.
- Classify the content Sort images into photographic, hard-edged graphic, text and screenshot, and pixel art, because each class needs a different method.
- Protect the master Work on copies or smart objects so every output is made in one resampling pass from the original, never from a previous output.
- Downsample with the right filter Reduce from the master straight to each target size using a reduction-oriented method.
- Upsample only when justified Enlarge within sensible limits, with a method built for enlargement, and escalate when the gap is too big.
- Sharpen for the output Apply sharpening after resizing, tuned to the final size and medium.
- Control delivery Make sure browsers, content systems and print workflows do not resample again in ways you did not intend.
- Check at 100 percent and document Inspect edges, text and texture at actual pixels, then record the settings as a reusable standard.
The rest of this article takes those phases one at a time. If you only have ten minutes, read the phases on classifying content and sharpening; those two decisions account for most of the visible difference between good and bad resizing.
Phase 1: Audit Your Originals and Output Targets
Goal: know exactly what you are resizing from and to before touching a single slider.
Resampling quality is capped by the source. A bicubic reduction from a clean 24-megapixel raw export will beat any method applied to a 900-pixel JPEG that has already been through three content systems. So the first job is detective work: for each image, find the largest original that exists. That might be the camera raw file, the retoucher's layered PSD or TIFF, the vector artwork for a logo, or the uncompressed export from a 3D render. If your library is disorganized, this step is where most of the time goes, and it is worth fixing properly; a structure built around products and variants, as described in our guide to organizing image libraries by product, makes the largest original easy to locate every time. Near-identical copies at different sizes are another trap, and finding duplicate images reliably helps you pick the true master rather than a downsized derivative with the same filename.
Write the target list in pixels
Next, list every size each image must serve, and express every one of them in pixels. "Hero banner," "Amazon main image" and "A4 brochure" are not sizes. A 2,400 by 1,000 pixel banner, a 2,000 by 2,000 pixel marketplace square and a 2,480 by 3,508 pixel page (A4 at 300 pixels per inch) are. Converting print dimensions means multiplying inches by the required pixels per inch; if the relationship between pixels, PPI and DPI is fuzzy for anyone on the team, this practical guide to pixels, PPI and DPI is the right primer before going further.
With source and targets side by side, calculate the scale factor for each output: target pixels divided by source pixels on the relevant axis. Anything below 100 percent is a downsample and is safe territory. Anything above 100 percent is an upsample and needs a decision, which Phase 5 covers. Flag any upsample above roughly 150 to 200 percent now, because those are the images where you may need a better original, an AI upscaler or a change of layout rather than a resampling setting.
Outputs and checks for Phase 1
The output of this phase is a simple table per batch: filename, original dimensions, original format, each target in pixels, and each scale factor. It sounds bureaucratic, but it takes minutes in a spreadsheet and prevents the classic mistake of enlarging a small image far beyond its resolution simply because nobody noticed the source was small.
- Each image traced to its largest available original, not a web export or email attachment.
- Originals are lossless or high-quality files (raw, TIFF, PSD, PNG, vector, or a JPEG saved at maximum quality).
- Every output target written as pixel dimensions, including print sizes converted at the required PPI.
- Scale factor calculated for each output, with upsamples above about 150 percent flagged.
- Aspect-ratio changes noted, so crops are planned before resizing rather than improvised after.
Phase 2: Classify Content and Match Resampling Methods to It
Goal: assign each image a resampling method based on what is in it, not on habit or software defaults.
All resampling methods answer the same question in different ways: given a grid of known pixels, what value should a new pixel between them have? The differences come down to how many neighboring pixels each method consults and how it weighs them.
- Nearest neighbor copies the value of the single closest source pixel. It never creates a new color, so hard edges stay hard, but on photographs it produces jagged diagonals and blocky enlargements.
- Bilinear averages the nearest 2 by 2 block of four pixels. It is fast and smooth but tends to look soft, especially when enlarging.
- Bicubic fits curves through a 4 by 4 block of 16 pixels, which preserves more apparent detail and produces smoother gradients than bilinear. Its slight overshoot at edges is why bicubic images look crisper, and also why they can show faint halos.
- Lanczos and similar windowed-sinc filters, common in command-line tools and image servers rather than in Photoshop's menu, consult a wider neighborhood and are popular for high-quality reduction. They are sharp but can ring around very high-contrast edges.
- Detail-preserving and AI-assisted enlargement, such as Photoshop's Preserve Details 2.0, go beyond fixed interpolation to reconstruct edges and texture when enlarging, with less blur than plain bicubic.
Photoshop exposes several of these variants in the Image Size dialog, and the Adobe Help Center's Photoshop User Guide describes them: Bicubic Smoother, intended for enlargement; Bicubic Sharper, intended for reduction; plain Bicubic for smooth gradients; Nearest Neighbor for hard edges; Bilinear; Preserve Details and Preserve Details 2.0 for enlargement; and an Automatic option that picks one based on whether you are making the image larger or smaller.
Four content classes, four answers
| Content class | Typical examples | Downsampling | Upsampling | What goes wrong with the wrong method |
|---|---|---|---|---|
| Photographic | Product shots, lifestyle, portraits, food | Bicubic Sharper or plain Bicubic, or Lanczos in pipelines | Preserve Details 2.0 or Bicubic Smoother, within limits | Nearest neighbor causes jaggies and moiré; oversharp filters cause halos on edges |
| Hard-edged graphics | Logos, icons, flat illustrations, charts | Re-export from vector if possible; otherwise Bicubic | Re-export from vector; avoid raster enlargement | Blurred or haloed edges, color fringes on brand colors |
| Text and screenshots | UI screenshots, packaging copy, infographics | Bicubic at modest reductions; recapture at the target size if heavy reduction is needed | Nearest neighbor at whole-number factors only | Illegible small type, smeared letterforms, gray fuzz around UI lines |
| Pixel art | Game sprites, retro graphics, favicons drawn pixel by pixel | Avoid, or nearest neighbor at whole-number factors | Nearest neighbor at 200, 300 or 400 percent | Smooth resampling turns crisp blocks into blurry mush |
The classification is not always clean. A product photo with a printed label is photographic overall but has text in a critical region. In that case, choose for the most important detail. If customers need to read the ingredients on a jar, the image should be treated with the caution you would give a screenshot: gentle reduction, careful output sharpening, and a check of the label at 100 percent.
Shortcut: Add a single content-class column to your Phase 1 table (photo, graphic, text, pixel). It lets you batch-process with the right method per group instead of deciding image by image, and it tells an outside retoucher at a glance which files need special handling.
Phase 3: Protect the Master Before Any Resampling
Goal: make sure every output is created in a single resampling pass from the original.
Each resampling pass is a small, irreversible loss. Reducing a file to 50 percent and then to 50 percent again is not the same as reducing it to 25 percent once; the intermediate step discards information and then interpolates from an already interpolated result, and the rounding and filtering errors compound. It is worse still with JPEGs: every save reintroduces compression artifacts, and resampling those artifacts smears them into new places where the next compression pass then treats them as real detail. Resizing compressed JPEGs repeatedly is one of the fastest ways to turn a sharp product photograph into a muddy one.
Practical ways to keep one pass
- Keep the master untouched. Store the retouched full-resolution TIFF or PSD as the master and make every derivative from it. Never overwrite it with a resized version, even temporarily.
- Use smart objects in Photoshop. When placing an image into a layout, convert it to a smart object before scaling. Photoshop then resamples from the embedded original each time you transform it, so scaling down and back up in a layout does not degrade it the way repeated transforms on a normal pixel layer would.
- Generate outputs in parallel, not in series. In a batch action or script, create the 2,000, 1,200 and 600 pixel versions each directly from the master, rather than making the 600 from the 1,200.
- Keep edits non-destructive. Retouching that lives on adjustment layers and masks can be carried to any size; our practical guide to layer masks covers how to build edits that survive resizing without re-masking.
If the only source you have is a legacy or unusual format, convert it once to a lossless working format before you do anything else. Opening an old file, resizing it and saving it back to a lossy format in one move locks in both losses. Converting legacy image formats properly first gives you a stable base to resample from.
- Master saved as a lossless, full-resolution file in a protected location.
- Layered edits kept non-destructive, with masks and adjustments on separate layers.
- Images placed into layouts as smart objects or linked files, not flattened pixels.
- Batch actions or scripts read from the master for every output size.
- No derivative file is ever used as the input for another derivative.
Phase 4: Downsample Cleanly From the Largest Original
Goal: reduce images to each target size with maximum retained detail and no artifacts.
Downsampling is the everyday case and the easier one, because you are throwing information away rather than inventing it. The main risks are softness from an overly gentle filter, halos and jaggies from an overly aggressive one, and moiré on fine repeating patterns such as fabric weaves, mesh, screens and architectural grids.
Choosing the filter for reduction
For photographs, Photoshop's Bicubic Sharper is designed for reduction and usually gives a crisp result at web sizes. On images that already have pronounced edge contrast or were sharpened at capture, it can tip into halos; in those cases plain Bicubic followed by your own controlled output sharpening gives you more control. In image servers and build pipelines, Lanczos-type filters are a common default for reduction and behave similarly to Bicubic Sharper, crisp with some risk of ringing on hard edges. The point is not which name is best in the abstract, but that you pick one deliberately, test it on your hardest content, and then apply it consistently.
Handling large reductions and fine patterns
When you reduce by a large factor, say from 6,000 pixels to 400, very fine patterns can alias into false stripes and ripples. Fabric, knitwear, speaker grilles and brickwork are the usual suspects. Two mitigations work well:
- Apply a very small blur, often in the range of 0.3 to 0.5 pixels, to the affected area of a copy before reducing. This removes frequencies too fine for the target size to represent, so they cannot fold back as moiré.
- Then reduce in one pass and sharpen the result for output, so the overall image stays crisp while the pattern stays clean.
This is a legitimate exception to the "sharpen after, not before" rule: you are softening before, not sharpening, and only to prevent aliasing.
Crop, then resize
If the output needs a different aspect ratio, crop the master first at full resolution, then resize the crop to the target. Cropping after resizing throws away pixels you just spent a resampling pass creating. Photoshop's Crop tool can do both at once when you enter the target width, height and resolution, which is convenient, but check that the resample method it uses is the one you intended; it follows the method set in preferences or the Image Size dialog.
A related shortcut: Set Photoshop's default image interpolation in Preferences to the method you use most for reduction. The Crop tool, Free Transform and several other features inherit it, so you stop getting silently different results depending on which tool someone reached for.
Phase 5: Upsample Only When the Math Allows It
Goal: enlarge images only within limits the source can support, using an enlargement-specific method, and know when to stop.
Upsampling cannot recover detail that was never captured. Classic interpolation spreads existing information across more pixels; the result can look smooth, but a 1,000-pixel image enlarged to 3,000 pixels still carries about one-ninth of the real information a native 3,000-pixel image would. That is why enlarging small images far beyond their resolution, then oversharpening to hide the softness, produces the plasticky, haloed look buyers instinctively distrust.
Picking the method for enlargement
- Preserve Details 2.0 is Photoshop's option for enlarging with less blur. It reconstructs edges and textures more convincingly than plain bicubic and includes a noise reduction slider, which matters because enlargement magnifies noise and compression blocks along with detail. On older versions of Photoshop you may need to enable it in the Technology Previews preferences before it appears in the menu.
- Bicubic Smoother is the classic interpolation choice for enlargement. It avoids crunchy edges but looks soft at large factors.
- Nearest neighbor is the only correct choice for pixel art and for screenshots you want to present as crisp pixel blocks, and only at whole-number factors such as 200 or 300 percent. At 150 percent, some source pixels become one output pixel wide and others two, which makes lines look uneven.
- Dedicated AI upscalers can go further than any interpolation method, but they invent plausible detail, which is a problem for product accuracy, text and logos. Our guide to getting super resolution and image upscaling right covers when those tools are worth it and how to catch hallucinated detail.
Practical limits
There is no universal threshold, but a useful working rule is this: modest enlargements of up to about 120 to 150 percent with a good method are usually invisible at normal viewing distances; enlargements around 200 percent are acceptable for backgrounds and lifestyle imagery but should be checked carefully on product details; and anything beyond that for critical imagery is a sign to find a better source, reshoot, rebuild the graphic in vector, or change the layout so the image runs smaller. How far you can push depends on the starting quality, the amount of noise and compression in the source, the viewing distance, and how much the viewer needs to trust the detail.
Warning: An upsampled image can pass a quick glance and still fail a customer who zooms. Before approving any enlargement of a product image, look at the areas buyers inspect most:
- Stitching, seams and material texture
- Printed text, labels and logos on the product
- Edges against the background, where halos and stair-stepping appear first
Phase 6: Sharpen After Resizing, for the Output You Are Making
Goal: restore the crispness that resampling softens, in amounts matched to the final size and medium.
Almost every resampling method softens the image at least slightly, because every new pixel is some kind of weighted average. Output sharpening compensates. The order matters: sharpen after resizing, not before. Sharpening a 6,000-pixel master and then reducing it means the sharpening halos, sized for the large file, are compressed into narrower, harsher lines, or averaged away unpredictably. Sharpening after the resize lets you set a radius that makes sense at the final pixel dimensions.
Starting points by output
These are practitioner starting points for Photoshop's Unsharp Mask or Smart Sharpen, not fixed rules. Always judge on the final file at 100 percent.
- Web images around 1,000 to 2,000 pixels wide: a small radius, typically 0.3 to 0.6 pixels, with a moderate amount. Keep threshold low, and raise it slightly on skin or skies to avoid emphasizing noise.
- Thumbnails and small grid images: a similarly small radius, often with a slightly higher amount, because detail lost at small sizes reads as blur very quickly.
- Print output: larger radii than web, because ink spread on paper softens the image and viewing distances are greater. Glossy coated stock tolerates less sharpening than uncoated paper. Judge print sharpening on a proof, not on screen, where it will look too strong.
Protect what should not be sharpened
Global sharpening emphasizes noise in shadows, texture in skin and compression blocks in smooth areas. Put the sharpening on a separate layer or smart filter and mask it to edges and textures that benefit, keeping it off skies, gradients and skin. Oversharpening to hide upscaling is one of the listed mistakes for a reason: it makes a resolution problem more visible, not less, by drawing bright outlines around every edge.
Before moving on, confirm the basics for this phase:
- Sharpening applied only after the final resize, never to the master before reduction.
- Radius chosen for the final pixel size, not carried over from another output.
- Sharpening on its own layer or as a smart filter, masked away from noise-prone areas.
- No white or dark halos visible along high-contrast edges at 100 percent.
- Print sharpening judged on a physical proof rather than on screen.
Phase 7: Control What Browsers and Platforms Do Next
Goal: prevent your carefully resized images from being resampled again, badly, after they leave your hands.
Your file is rarely the last thing to scale an image. Browsers rescale images to fit their layout box and the device's pixel density; content systems and marketplaces generate their own thumbnails; social platforms recompress and resize on upload. Each one is another resampling pass you do not control unless you plan for it.
Browsers and the image-rendering property
When an image is displayed at a size different from its pixel dimensions, the browser resamples it. By default browsers use a smooth algorithm, which is right for photographs and wrong for pixel art and some screenshots. The CSS image-rendering property influences how images are scaled; the MDN Web Docs reference for image-rendering documents values including auto, smooth, crisp-edges and pixelated. For pixel art enlarged in the browser, pixelated tells the browser to keep hard blocks rather than blurring them. Support and exact behavior vary by browser, so test in the browsers your audience uses.
For photographs, the best way to control browser resampling is to avoid needing much of it: serve a file close to the displayed size. That is what responsive images are for. Providing a set of widths with srcset and sizes lets the browser pick a file near the rendered size at the device's pixel density, so it downsamples only slightly or not at all. The mechanics are covered in responsive image delivery, done properly, and the export settings that go with it, including format and compression choices, are in exporting images for the web.
Content systems, marketplaces and social platforms
Many platforms generate derivatives from whatever you upload. Where they publish recommended dimensions, upload at those dimensions or a clean multiple of them, so their resize is either unnecessary or a simple reduction. Where you can configure the resize yourself, as with an image server or a self-hosted content system, set the resampling filter explicitly rather than trusting a default, and make sure derivatives are generated from your uploaded master, not from one another.
Phase 8: Prepare the Print Path From Limited Originals
Goal: deliver print files with enough real resolution, resampled once, and checked before they go to press.
Print is where resampling decisions become expensive. A web image viewed on a phone hides a lot; a poster or packaging panel viewed from half a meter does not, and a reprint costs far more than a re-export. The common conventions are well known: around 300 pixels per inch at final size for close-viewed materials such as brochures and packaging, and lower effective resolutions for large-format pieces viewed from a distance. Your printer's specification overrides any rule of thumb.
Resample to the printer's numbers, once
Compute the required pixel dimensions from the final trim size plus bleed and the required PPI. If the master has more pixels than needed, reduce once to exactly that size with your photographic reduction method, then apply print sharpening. If the master has fewer pixels, decide consciously: either accept a lower effective PPI if the printer confirms it is acceptable for the viewing distance, enlarge with Preserve Details 2.0 within the limits from Phase 5, or find a better source. Changing only the PPI number in the Image Size dialog with resampling turned off does not add or remove any pixels; it simply changes the printed size, which is often the smarter first move.
When web and print share one limited original
The hardest case is an image that must serve both web and print from a small original, typically supplier imagery, archive photos or user-generated content. The web versions are usually fine because they are reductions. The print version is where the gap shows. This is precisely the situation where bringing in help pays off, because the fix is often a combination of reconstruction, cleanup, careful enlargement and targeted sharpening that goes beyond a menu choice. Before approving, run the file through a proper preflight; checking images before print covers effective resolution, color and bleed checks in detail.
Worked Example: One Product Master, Seven Outputs
The following is an illustrative project, not a client case, with realistic numbers to show how the phases fit together.
A homewares brand has a retouched master of a woven cushion at 6,000 by 4,000 pixels (a 3:2 frame), saved as a 16-bit TIFF. It also has a supplier photo of the same cushion in a second colorway at only 1,200 by 1,200 pixels, delivered as a JPEG. The brand needs a marketplace square, a product-page zoom image, a product-page standard image, a category thumbnail, a homepage banner and an 8 by 10 inch catalog page, plus the marketplace square for the second colorway.
| Output | Source | Crop from source | Target pixels | Scale factor | Method |
|---|---|---|---|---|---|
| Marketplace square | Master | 4,000 by 4,000 | 2,000 by 2,000 | 50% | Bicubic Sharper, then light web sharpening |
| Product zoom | Master | 4,000 by 4,000 | 3,000 by 3,000 | 75% | Bicubic, then light web sharpening |
| Product standard | Master | 4,000 by 4,000 | 1,200 by 1,200 | 30% | Bicubic Sharper, then web sharpening |
| Category thumbnail | Master | 4,000 by 4,000 | 600 by 600 | 15% | Pre-blur weave slightly, Bicubic, then sharpening |
| Homepage banner | Master | 6,000 by 2,500 | 2,400 by 1,000 | 40% | Bicubic Sharper, then web sharpening |
| Catalog page, 8 by 10 in at 300 ppi | Master | 3,200 by 4,000 | 2,400 by 3,000 | 75% | Bicubic, then print sharpening checked on proof |
| Second colorway marketplace square | Supplier JPEG | 1,200 by 1,200 | 2,000 by 2,000 | about 167% | Preserve Details 2.0 with noise reduction, or reshoot |
Every master-based output is a reduction made in a single pass from the TIFF, with the crop taken first at full resolution. The 600-pixel thumbnail is reduced to 15 percent, a large factor on a woven fabric, so the team applies a sub-pixel blur to the cushion on a copy before resizing to avoid moiré in the weave, then sharpens the result. The banner and catalog page use different crops of the same master, and each gets sharpening appropriate to its medium after resizing.
The second colorway is the problem child. At roughly 167 percent enlargement from an already compressed JPEG, Preserve Details 2.0 with moderate noise reduction produces a usable marketplace image, but the weave looks slightly synthetic at 100 percent. The team has three honest options: accept it for the marketplace only and keep it out of print, recolor the master to create the second colorway if the products are otherwise identical, or reshoot. Because the marketplace requires the image to represent the product accurately, the illustrative team chooses to reshoot and uses the enlargement as a temporary placeholder. That decision is exactly what the Phase 1 scale-factor column exists to surface early.
Phase 9: Check at 100 Percent and Document the Standard
Goal: catch resampling problems before publication and turn the settings into a repeatable standard.
Zoomed-out previews hide everything that resampling gets wrong. Screen previews at fit-to-window are themselves resampled on the fly, so they can make a soft file look sharp or a jagged one look smooth. The only honest view is 100 percent, where one image pixel maps to one screen pixel. On high-density displays, remember that the operating system may scale the view; check at the application's actual-pixels setting and, for web output, in a browser at the intended display size.
What to look for
- Text: letterforms clean, small type legible, no gray fringing around thin strokes.
- Edges: no stair-stepping on diagonals, no bright or dark halos along high-contrast boundaries.
- Texture: fabric, wood grain and skin look natural, neither smeared nor crunchy, with no moiré.
- Gradients: skies and studio backgrounds free of banding introduced by resampling or sharpening.
- Pixel art and UI: every block the same size, lines of uniform width.
A realistic schedule for a standard-setting batch
Setting up the standard is a one-time investment. The schedule below reflects a typical first batch of around 50 to 100 images for a small in-house team; larger catalogs or messy libraries take longer, mostly in the audit.
- Day 1 Audit originals, write the target list in pixels, calculate scale factors and flag risky upsamples.
- Day 2 Classify content, pick a method per class and test each on the three hardest images in the batch.
- Day 3 Build the batch actions or pipeline configuration, generating each output directly from the master.
- Day 4 Run the batch, apply output sharpening per size, and check a sample of every class at 100 percent.
- Day 5 Fix outliers, verify delivery in browsers and platforms, and write the one-page resizing standard.
Write it down
The documented standard should fit on one page: content classes, the resampling method for reduction and enlargement in each class, sharpening starting points per output, the maximum acceptable enlargement before escalation, and where masters live. Record the resize settings in file metadata or naming conventions too, so anyone who picks up a derivative knows how it was made; if you already manage keywords and credits in bulk, add a processing note using the same approach you use for bulk metadata editing.
Common Resampling Mistakes and When to Bring in Help
Most resampling problems are not exotic. They are the same handful of habits, repeated across thousands of files.
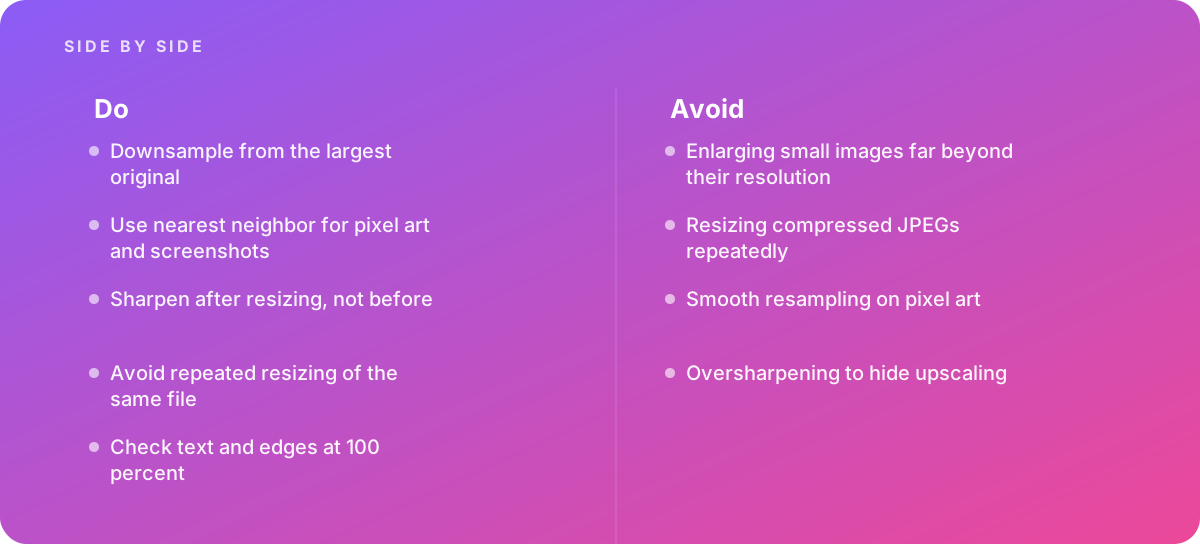
- Enlarging small images far beyond their resolution. No method recovers detail that was never captured. Escalate large enlargements instead of hoping a filter will save them.
- Resizing compressed JPEGs repeatedly. Every cycle of resample and recompress adds artifacts. Always go back to the master.
- Smooth resampling on pixel art. Bicubic and bilinear blur hard-edged blocks into mush. Use nearest neighbor at whole-number factors, and pixelated rendering in the browser.
- Oversharpening to hide upscaling. It trades softness for halos and makes the enlargement more obvious, not less.
- Trusting the preview. Fit-to-screen views are resampled themselves. Judge at 100 percent.
- Letting the last platform decide. If you upload at arbitrary sizes, a marketplace or content system will resample with whatever filter it uses. Upload close to its recommended dimensions.
Bring in help when images must be resized for both print and web from limited originals, when a catalog has thousands of images with inconsistent sources, or when product accuracy is at stake and upscaling might misrepresent the item. A specialist can combine reconstruction, cleanup and careful enlargement in ways a single menu choice cannot, and can set up the batch standard for you. If that is where you are, our image editing and retouching services cover exactly this kind of work, and a clear brief speeds it up; this guide to image briefs for retouchers explains what to include, such as the target sizes, content classes and acceptable enlargement you worked out in the phases above.
Shortcut: When you hand files to an outside retoucher, send the Phase 1 table with them. Listing the source, every target in pixels and the scale factors lets them flag impossible enlargements before starting, which saves a revision round.
Where this comes from
- Adobe Help Center — Photoshop User Guide
- MDN Web Docs — image-rendering
The figures and practices above come from the sources listed.
Working on something like this?
We take on Image Editing & Retouching work for teams who want it done once, properly. Tell us what you are building and we will tell you honestly whether we are the right studio for it. Start a project.
Where to go next
Spotted something wrong? Report an error on this page. We correct on the page and say what changed.